
About ProductScope AI & Getting Started
What is ProductScope AI?
ProductScope AI helps e-commerce brands design stunning product photos and high-quality content in minutes using generative AI across 2 core product families:
Here’s a breakdown of our two core product lines (each product line is a separate subscription and has its own tools):
- PS Studio (for brands, designers, marketers, and content creators):
- 📸 Photoshoot: Create stunning product photos without expensive shoots using custom trained models
- 👗 Fashion: Instantly try on clothing on any model in any setting
- ⚡ Agents: Automate repetitive content creation & research tasks up to 90% complete
- 🤖 Ask AI: Get intelligent AI assistance for business
- PS Optimize (for Amazon-only brands and agencies):
- ✏️ Listing Optimizer: Boost Amazon sales by 30%+ with data-driven insights
- 🔑 Customer Insights: Perform sentiment analysis on products
- 🤖 Ask AI: Get intelligent AI assistance for Amazon & DTC E-commerce
Who is the target audience for ProductScope AI?
E-commerce brands, designers and marketing agencies who are knowledgeable but either struggle with or looking to enhance their current content creation, marketing and sales workflows, for 10x faster and 10x cheaper using AI.
How can I sign up for a free trial?
You can sign up risk free and without credit card here: https://app.productscope.ai/auth/sign-up
We don’t have a free trial but we do offer 200 free PS Studio credits which can be used across any of the 4 core Studio products – AI Product Photoshoot, AI Fashion, Agents and Ask AI. You also get 1 listing optimization free in PS Optimize’s Amazon listing optimizer. You will however need to subscribe to a plan in order to use any premium features.
And if you sell on Amazon you’ll need this free but powerful Amazon chrome extension to get unique insights on any amazon ASIN: https://chromewebstore.google.com/detail/chatgpt-for-amazon-from-p/opbmiilmogkpallllgollkihjpofjhff
How much does Products Scope AI cost?
With a free account, you get 200 free studio credits to test any of our core tools – Photoshoot, Agents and Ask AI. You also get 1 free listing optimize in the PS Optimize plan for our Amazon Listing Optimizer tool.
Our detailed pricing page can be found at: https://productscope.ai/pricing/
On the paid AI Photoshoot plans, you can:
- Get up to 1,000 Studio credits every month ($19/month) or 3000 ($49/month)
- Generate custom backgrounds for your product or Ask AI to generate prompts
- Upload your own reference scenes or branded assets
- Resize images to any dimensions or aspect ratio
- Access to all Magic Editing tools
- Save up to 20% with our annual plans! ($168/year and $468/year respectively)
On the paid Amazon Listing Optimizer plans, you can:
- Create or optimize up to 10 listings every month ($34/mo) or 50 listings monthly ($99/mo)
- Get rich backend keywords and subject matter fields for any listing
- Access to additional listings at $3/listing optimization as add-ons
- Optimize listings across 13 Amazon Marketplaces
- Access to 6 different languages (with more coming soon!)
- Access to deeper customer insights
- Access to Chatbot for Amazon (Dobby) for any question related to selling on Amazon
- Export functionality to PDF or .xlsx (excel)
- Save up to 30% with our annual plans! ($288/year and $828/year respectively)
Fun fact: The Annual Starter plan gives you access to a cumulative 120 listing optimizations for $288 which also happens to be the cost that my Agency used to charge for 1 listing optimization. Thanks to AI you can experience a 1/120th cost reduction without drop in quality given our model’s trained inputs and usage of customer insights, all in minutes.
You can cancel your subscription anytime by emailing support@productscope.ai
Who owns the images I create?
You! You own the images and are free to use it as you wish.
AI Photoshoot Tool
How do I generate good product photos?
Creating high-quality product photos hinges on two essentials: your photo’s initial quality and the background scene you select. Here’s 4 key methods to generate good product photos:
- Themes: Tap into a library of over 600 pre-set scenes across 30+ themes for quick use. Pick the scene you like and drop it on the canvas, resize and orient your product as naturally as you can in your chosen scene and then hit “Generate Photos” to get 4 options. We kept the original product in some scenes for better visualization. Overlay your product to fully cover the original, then run the “Generate Photos” button to prevent the original product from showing or use the Magic Eraser to remove it first.
- Custom (without Scene): Simply upload your product photo, enter a descriptive product name and your desired scene description prompt. Use the “Ask AI” feature to generate a scene prompt for your product. Then directly hit the “Generate Photos” button under the canvas and NOT “Generate Scenes” since you are going straight to the final photos in this method. This method offers speed at the cost of some control, with outcomes reliant on your photo and chosen prompt.
- Custom (with Scene): In this method there is the 1 extra step where you will generate 4 scenes first to choose from before proceeding to the final photos. Do this by clicking the “Generate Scenes” button under the custom scene prompt box. Note you can even upload your own reference scene using the “+” sign above your canvas. Once your chosen scene is on the canvas, place your product into that scene, resize and orient so it looks as natural as possible. For additional help, the “Ask AI” feature generates scene suggestions. After selecting a scene, you may edit it further, adjust your product’s placement and size, then produce your photos. This approach allows for greater control over the final images generated.
- Burst Mode: This is like the Custom (without Scene) but on steroids, this mode generates batches of 10, 20, or even 30 unique product photos at once, automatically selecting scenes for you without lifting a finger. While it limits scene control, it’s excellent for generating a variety of ideas quickly. Pro-tip: Enjoyed a particular photo? Simply reuse its prompt in the Custom (with Scene) workflow for finer control and higher quality results.
To conclude, use the method you prefer and that gives you the best results. We designed the Photoshoot tool to be flexible in this regard but highly recommend either of the Custom workflows in tandem with the upscaler to yield the highest quality results.
What is the difference between “Generate Scenes” and “Generate Photos”?
The “Generate Scenes” and “Generate Photos” buttons serve distinct functions in the process of creating product images.
– Generate Scenes: This button is used when you want to select or customize the background for your product. In the Custom (with Scene) method, after entering a scene description, clicking “Generate Scenes” produces up to four different background scenes. This step allows you to visualize and choose the most suitable backdrop for your product before finalizing the photo. It’s about setting the stage for your product.
– Generate Photos: After placing and adjusting your product in the chosen scene/canvas, hitting the “Generate Photos” button processes the combined image (product + background prompt) to create final, polished product photos, complete with shadows and reflections. No matter what workflow you use, this button is the last step to bring your photos to life.
In essence, “Generate Scenes” is about selecting and customizing the right stage (background scene) for your product, while “Generate Photos” finalizes the image with your product in that scene, ready for your marketing endeavors.
Some of the templates have an existing product in them when I add to the canvas, how can I use that as a scene?
We left the products in those templates so you could visualize how your product could look before picking those scenes. There are 2 ways to ensure that this other product is not visible in your final product photos generated –
1) Ensure to resize and place your product to cover the original product properly.
2) If it’s not possible to do or looks bad doing so, we recommend using the Magic Edit feature to erase the original product and then add your product into that area (note you can also use “Magic Redraw” to smooth out any haziness left behind by the Magic eraser option which happens in some cases).
Are there any products or product types that don’t work well with the AI Photoshoot tool?
Most products work great but we’ve noticed when the product image is low quality or super tiny/fine like fine necklaces or products on models etc can lead to low quality photos from the AI Model. Recommend choosing a good quality product photo and with a perspective or composition where it can naturally be placed into or onto any setting by the AI.
How do I generate photos with multiple products?
Unlike other tools, even on a free account you can upload multiple products via the “Assets” tab and then choose those products on your canvas while designing photos. Each of those products would be its own “layer” which can be manipulated to your liking.
How do I download the generated images at higher quality?
ProductScope AI automatically preserves the quality of your input product images but if for any reason you need to upscale it you can click on “Magic Edit” tab and scroll down to “Upscale Image [Choose Scaling Factor]” and pick either 2x or 4x and hit “Apply”.
This will either 2x or 4x the quality and resolution of your canvas image. Note the photo size can go up quite a bit but you should see the photo quality and even text get a lot crisper at 2K or even 4K resolutions!
How to resize my canvas image to different sizes or aspect ratios?
The default canvas size is 1024×1024 pixels but you can easily resize your canvas photo to multiple supported aspect ratios by either going into the “Magic Edit” tab and scrolling to the ” Resize or Upscale” section (you can also just click the “resize or upscale” button at the bottom of your canvas and it will take you into the Magic Edit tab.
Then select a canvas size from the dropdown menu – we currently support all the below resolutions for photos:
1024 x 1024 px – 1:1 Square [Default]
1080 x 1080 px – 1:1 Square [Instagram Post]
1080 x 1350 px – 4:5 Portrait [Facebook Post]
1080 x 1440 px – 3:4 Portrait [Digital Art or Print Media]
1080 x 1920 px – 9:16 Portrait [Instagram Story]
1440 x 1080 px – 4:3 Landscape [Etsy Photo, LinkedIn]
1600 x 900 px – 16:9 Landscape [Twitter Photo]
2048 x 2048 px – 1:1 Square [Amazon/Walmart/Ebay Photos]
Once you’ve selected the size or aspect ratio you want, click “Apply” to have AI automatically resize your canvas photo. Note if going from shorter height or widths to longer the AI model will essentially fill in the gaps to match your existing prompt.
How to remove unwanted objects in my generated images?
Under the “Magic Edit” tab, click on the “Erase” button within the “Magic Erase or Redraw” section. Use the brush to paint over the unwanted object (feel free to increase or decrease your brush width as you need) then hit the blue arrow button to magically erase the unwanted objects from your image.
Note if there’s some “haziness” left behind you can use the “Redraw” feature with the prompt “naturally fill the scene to remove any haziness” as it can help.
How to add objects in my generated images?
Much like the Magic Erase option, you can also add objects by clicking on the “Redraw” button in the “Magic Erase or Redraw” section. Use the brush to draw where you want the new object to appear, then type a prompt of what you want to add.
For example: “Add strawberries on the table”. Keep it short and focus on the object for the best results. Use the “Undo” and “Redo” buttons to try different prompts if you need to tweak it further.
How to adjust the colors, brightness & saturation?
You can easily adjust the hue, brightness or saturation for any layer including the entire canvas photos by clicking the “bulb” icon at the top right of your canvas. You’ll see a drop down where you can adjust sliders for hue, saturation, and brightness.
How to manually add shadows?
While our final “Generate Photos” button will automatically add shadows and reflections, if for any reason you need to manually add some its easy to do by clicking the “cloud” icon on the top right of your canvas to add shadows along with the colors of your choice using a color picker tool.
Is there a limit to the number of photos I can generate with the AI Photoshoot Tool in a month?
Yes on the Starter plan it’s 1000 images/month and on the PRO plan it can be unlimited.
I tried so many times but can’t get the results I want. Please help!
Absolutely, we’re here to assist! Please reach out to us at support@productscope.ai, including the details below:
– A description of the images you’re aiming to create
– Examples of images similar to your desired outcome
– Details of your attempts, like chosen themes and descriptions
Can I upload my own background to use to place my products into?
Yes absolutely! Just click the “+” icon on the top left of the canvas and choose ‘Upload Background Scene’ from the drop down to upload your own reference backgrounds on to the canvas. Unlike product or branded assets, custom backgrounds scenes will not be automatically saved to your Assets tab.
Amazon Listing Optimizer
What’s special about this Amazon listing optimizer compared to the competitors on the market?
The Amazon listing optimizer tool efficiently crafts product listings, incorporating high-impact keywords and weaves in strategic customer insights gleaned from your reviews. This approach has been shown to increase conversion rates by over 27% on average.
Our prices are also the lowest you’ll find for the quality you’ll get. It also includes a dedicated Customer Insights tab and a chatbot called ‘Dobby’ that you can use to get any Amazon specific seller related information/assistance.
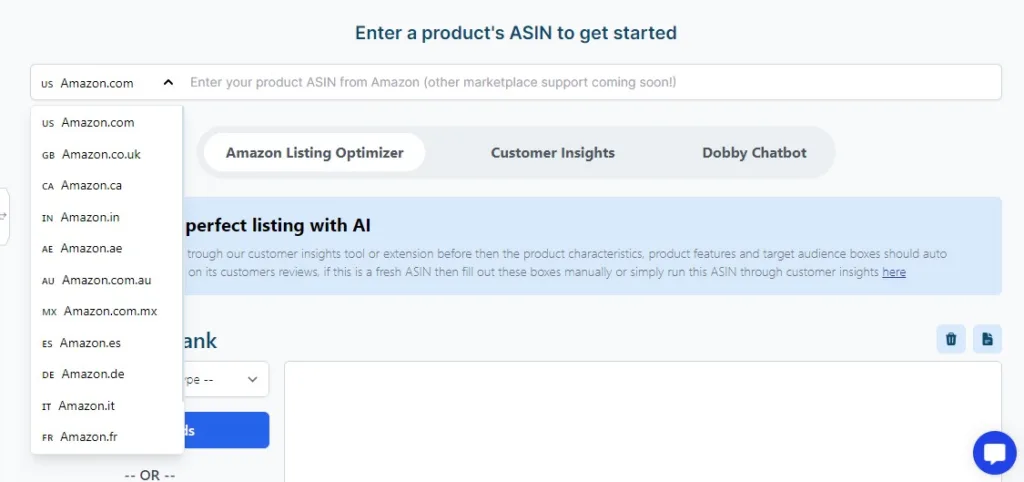
How do I optimize my listing?
If it’s an existing ASIN, first go to its product detail page then click on the free Amazon customer insights chrome extension from ProductScope AI (orange bumble bee icon) in your Chrome or Brave browser. It should display some basic information like your product title, main image, best seller rank and number of verified reviews.
Click on the “Analyze Reviews” button at the bottom and then on “View Insights” once it’s done. Once you have your Insights, it’s time to click on “Optimize Listing” so you go directly into the web app.
Here you can either use the free in-built Keyword research tool to generate your ‘Primary’ keywords for your listing or you can copy and paste from your external research/softwares of choice. Once you submit the keywords you can see your insights and listing title/bullets/descriptions etc all pre-populated.
Review all the information, make any edits as you need to the insights and then hit “Re-write for me” for each item in the listing to get a fully optimized listing variant that weaves in your top keywords and customer insights in a way that appeals to your target audience.
What if I want to create a NEW listing that does not exist on Amazon yet?
No worries! In this case you just have to use your competitors ASIN in the customer insights extraction with the chrome extension then come into the listing optimizer.
Put in your keywords and then update the insights as you would want for it to apply to your own listing then re-write every aspect of the listing accordingly. Once you’re happy with it just export to PDF or .xlsx.
What if my listing has no reviews to be analyzed when using the chrome extension?
In this case you can use the normal process and just fill in the customer insights yourself based on your knowledge of your products benefits / motivations and features etc or you use your competitors ASIN in the customer insights extraction with the chrome extension then come into the listing optimizer.
Put in your keywords and then update the insights as you would want for it to apply to your own listing then re-write every aspect of the listing accordingly. Once you’re happy with it just export to PDF or .xlsx.
What marketplaces and languages are supported?
Works for all Amazon products (FBA, Merch by Amazon and KDP) across 13 marketplaces (US, UK, CA, Japan, Germany, India, Mexico, Spain, France, Italy, UAE, Australia, Netherlands ) with multiple language translations available as well.
What languages are supported?
You can also run optimizations in 1 marketplace and have it translated into 6 different languages – Hindi, Spanish, German, Dutch, Italian and French. This makes it extremely easy to list in other marketplaces in a single click in minutes.
Is there a direct integration in the listing optimizer to my Amazon account?
No, we don’t connect to your Amazon Seller Central account. You would use this tool separately and then take your final optimized listing output (PDF or .XLSX files) and upload it to your account yourself. If you’re an Ad Agency client with FosterFBA.com your account manager would take care of it for you of course.
What AI model is used for the optimization?
The free account uses GPT-3.5 from OpenAI and the paid accounts use GPT-4 the most advanced model currently available and we will ensure to always upgrade it as more and more newer models come out.
Are there any restrictions in place to ensure listing re-writes don’t get Amazon sellers suspended?
Yes, we’ve taken precautions to ensure words that fall into the category of ‘abusive’, ‘NSFW’, or pesticide related ‘FDA approved, etc’ are not included in the listing. That said it’s always advised to do a manual review of your optimized listing before uploading to Amazon.
Customer Insights Chrome Extension
What does the Chrome extension help with?
The Customer Insights Extension & Web Application grab insights across the following 6 data points:
ProductScope AI’s Voice of Customer (VoC) Analysis utilizes Artificial Intelligence to analyze Amazon reviews, transforming them into meaningful insights about customer demographics, intent, sentiment, and motivation.
This provides a comprehensive Amazon voice of the customer understanding, which can help shape your product development and market positioning strategies across 6 unique data points:
Customer Profile – The “Who”, “What”, “Where” and “Why” for your product based on your customers reviews
- Pro Sentiments – Insights showcasing the positive sentiments of the ASIN product
- Con Sentiments – Insights showcasing the negative sentiments of the ASIN product
- Product Features – Features of the product taken directly from customer reviews in their language
- Buyer Motivations – these are the reasons the customers are buying the product
- Product Improvement Suggestions – Insights into what the customers are wanting or expecting the product to include or offer in order to be valued more
Just hop onto your Amazon.com (or .any of the other 10 marketplaces) product detail page (e.g., www.amazon.com/dp/{ASIN}), click on our chrome extension (it looks like an orange bumblebee), and you can run ‘Analyze Reviews’ to grab your customer insights, then you can choose to open up any other web tool directly from the extension.
You can also grab the Amazon main image into our AI Photoshoot tool or optimize the listing directly from the Chrome extension as it’s fully paired with our Web app tools!
What browsers are supported?
Currently the extension is only available on the Google Chrome store and as such the browsers supported are Chrome and Brave Browsers.
Where can I download the ProductScope Amazon Chrome Extension?
You can download the Free Amazon Insights chrome extension here: https://chromewebstore.google.com/detail/chatgpt-for-amazon-from-p/opbmiilmogkpallllgollkihjpofjhff
Is the chrome extension free to use forever?
Yes, it’s free to use forever. We do have a rate limit of 10 uses / day to ensure rogue actors don’t misuse it.
What’s different between the customer insights in the chrome extension versus customer insights in the web app?
The only difference is in the number of insights received per data point. In the chrome extension the maximum number of insights you’ll see for each data point is 5. In the web app you can get up to 10 insights.
What reviews are analyzed by the extension?
Only ‘Verified’ reviews are analyzed by the chrome extension to ensure that we don’t take fake reviews to the best of our ability.
Can I download my amazon reviews with this extension?
Yes, you can click on “Download Reviews” directly from the chrome extension when you’re on any Amazon product detail page.
Account Management & Billing
How do I reset my password or recover my account?
If you created your account using credentials then you should be able to go into Profile > Change Password and hit Save. If it’s not working for any reason just email us at support@productscope.ai and we’ll take care of it for you!
Can I share my ProductScope AI account with my team?
You will be able to do this on the Business plans only.
What payment methods do you accept?
We use Stripe for our payment processing and they accept all major credit cards globally.
Can I upgrade, downgrade, or cancel my subscription at any time?
Absolutely! You can go into your Settings: Plans & Billing and below each plan there’s a button where you can either upgrade or downgrade based on the plan you want to move into. You can also click on “Manage Subscription” under your active plan to either – pause/unpause it, cancel it or even download your invoice should you want it.
What happens to my data if I delete my account?
The only data that is yours is the Product Photos which automatically get deleted after 30 days if you were previously on the Starter plan or after 90 days if you were on the PRO plan. Please ensure to download any images you wish to retain for your records before that happens.
If you need your data deleted earlier you can send the request to support@productscope.ai.
Please note Amazon customer insights is public data as taken directly from the public Amazon ASIN customers reviews and we will store that information indefinitely.
Support and Troubleshooting
How can I report a bug or suggest a feature for ProductScope AI tools?
To report a bug you can click the chat widget in the app then click on “Report an issue” to record your bug directly inside the app! Alternatively you can email us at support@productscope.ai but please include as much information as possible so we can recreate it internally and solve it quickly.
To request a feature you can easily do that on our Roadmap page: https://roadmap.productscope.ai/ or via the chat widget as well.
Data Privacy and Security
How does ProductScope AI protect my data and privacy?
At ProductScope AI, your data is not stored with a 3rd party AI technology provider. When you use our AI language or image models, your anonymized data is shared with our third-party Large Language Learning Model (“LLM”) partner only when you use the feature.
We have ensured that our LLM partner has a “Zero-Retention/Zero Training Policy” with respect to all ProductScope AI’s data, meaning that our LLM partner will not store or retain any of the anonymized user data, and will not use any of the anonymized data for training any algorithms or LLM technology.
Other Questions
Does ProductScope AI have an API?
No we don’t have an API yet but we do have a waitlist so please submit this quick form if interested: https://tally.so/r/3EXXgl
Are there any tutorials or resources available to get the most out of ProductScope AI tools?
Yes! Below are some quick demo Videos (+ gallery page ) showcasing the AI Photoshoot tool:
1. PS Studio Photoshoot: https://www.youtube.com/watch?v=nnIFtYxkbn0
2. PS Studio Agents: https://youtu.be/xq7dTwh6bTs?t=33
3. PS Studio Ask AI: https://www.loom.com/share/208028fd355448bd94285ea669080353?sid=ff5ab4de-6f77-44d5-aac5-a17a3c27aaa1
4. PS Optimize Listing Optimizer: https://www.loom.com/share/ea5cc3a8499b48bb87012605de777c87?sid=3ff1924f-cd46-4689-9a2d-7e0e5f0b830c
5. PS Optimizer Customer Insights: https://www.loom.com/share/5acd22441fc048b5848e4abd9dac54c4?sid=e1721a47-afb8-4055-a257-30bcb6888adb
6. Demo Video for the Chrome Extension (Amazon only): https://www.youtube.com/watch?v=y3AbxYTQf9A
7. Gallery Page: https://productscope.ai/gallery
If you’re still needing more, not to worry just sent a message through our chat widget and someone will help you!
How are credits deducted?
| No | Category/Tool | Operation/Model | Credits Used (Per Image/Action) |
Free Tier | PS Studio Starter | PS Studio PRO | PS Studio Business (Coming Soon) |
| 1 | Number of Users | NA | NA | Single User | Single User | Single User | 3 users included and $49/mo per PRO seat additionally |
| 3 | Generate Photo [Base Model] | SD 3.5 Large | 15 | NA | Upto 66 generations /mo | Upto 200 generations /mo | Upto 200 generations /mo per user |
| 4 | Generate Photo [Base Model] | Flux 1.1 PRO | 15 | NA | Upto 66 generations /mo | Upto 200 generations /mo | Upto 200 generations /mo per user |
| 5 | Generate Photo [Base Model] | Recraft V3 (Realism) | 15 | NA | Upto 66 generations /mo | Upto 200 generations /mo | Upto 200 generations /mo per user |
| 6 | Generate Photo [Base Model] | Recraft V3 (Vector) | 20 | NA | Upto 50 generations /mo | Upto 150 generations /mo | Upto 150 generations /mo per user |
| 7 | Generate Photo [Base Model] | AI Logo Generator | 20 | NA | Upto 50 generations /mo | Upto 150 generations /mo | Upto 150 generations /mo per user |
| 8 | Generate Photo [Base Model] | Flux Schnell | 5 | Upto 40 images | Upto 200 generations /mo | Upto 600 generations /mo | Upto 600 generations /mo per user |
| 9 | Generate Photo [Base Model] | Flux Realism | 10 | Upto 20 images | Upto 100 generations /mo | Upto 300 generations /mo | Upto 300 generations /mo per user |
| 10 | Generate Photo [Custom Model] | Custom User Model | 10 | NA | Upto 100 generations /mo | Upto 300 generations /mo | Upto 300 generations /mo per user |
| 11 | Generate Photo [Photoshoot Model] | Product Photoshoot | 8 | Upto 25 images | Upto 125 generations /mo | Upto 375 generations /mo | Upto 375 generations /mo per user |
| 12 | Generate Photo [Photoshoot Model] | Jewelry Photoshoot | 8 | Upto 25 images | Upto 125 generations /mo | Upto 375 generations /mo | Upto 375 generations /mo per user |
| 13 | Generate Photo [Photoshoot Model] | Fashion/Try-On Photoshoot | 10 | 1 use | Upto 100 generations /mo | Upto 300 generations /mo | Upto 300 generations /mo per user |
| 14 | Generate Photo [Burst Mode] | Burst Mode x10 | 120 | 1 use | Upto 8 generations /mo | Upto 25 generations /mo | Upto 25 generations /mo per user |
| 15 | Magic Edit | Background Remove | 0 | FREE | FREE | FREE | FREE |
| 16 | Magic Edit | Magic Erase | 2 | NA | Upto 500 generations /mo | Upto 1500 generations /mo | Upto 1500 generations /mo per user |
| 17 | Magic Edit | Magic Draw | 20 | NA | Upto 50 generations /mo | Upto 150 generations /mo | Upto 150 generations /mo per user |
| 18 | Magic Edit | Magic Relight | 10 | Upto 20 uses | Upto 100 generations /mo | Upto 300 generations /mo | Upto 300 generations /mo per user |
| 19 | Magic Edit | Magic Resize | 12 | NA | Upto 80 generations /mo | Upto 250 generations /mo | Upto 250 generations /mo per user |
| 20 | Magic Edit | Magic Reimagine | 10 | Upto 20 uses | Upto 100 generations /mo | Upto 300 generations /mo | Upto 300 generations /mo per user |
| 21 | Magic Edit | Magic Upscale [2x] | 4 | NA | Upto 250 generations /mo | Upto 750 generations /mo | Upto 750 generations /mo per user |
| 22 | Magic Edit | Magic Upscale [4x] | 12 | NA | Upto 80 generations /mo | Upto 250 generations /mo | Upto 250 generations /mo per user |
| 23 | Magic Edit | Magic Decompose | 10 | NA | Upto 100 generations /mo | Upto 300 generations /mo | Upto 300 generations /mo per user |
| 24 | Custom Models | Model Training (Strong) | 300 | NA | Upto 3 trainings /mo | Upto 10 trainings /mo | Upto 10 trainings /mo per user |
| 25 | Custom Models | Model Training (Stronger) | 600 | NA | Upto 1 trainings /mo | Upto 5 trainings /mo | Upto 5 trainings /mo per user |
| 26 | Custom Models | Model Training (Strongest) | 900 | NA | Upto 1 trainings /mo | Upto 3 trainings /mo | Upto 3 trainings /mo per user |
| 27 | Custom Models | Model Training (Maximus) | 1200 | NA | NA | Upto 2 trainings /mo | Upto 2 trainings /mo per user |
| 28 | Agents | Agent Operation | 5 | Upto 40 uses | Upto 200 agent ops /mo | Upto 600 agent ops /mo | Upto 600 agent ops /mo per user |
| 29 | Videos | Runway ML Gen3 [5 sec] | 100 | NA | Upto 10 Videos / mo | Upto 30 Videos / mo | Upto 30 Videos / mo per user |
| 30 | Videos | Runway ML Gen3 [10 sec] | 200 | NA | Upto 5 Videos / mo | Upto 15 Videos / mo | Upto 15 Videos / mo per user |
| 31 | Videos | Minimax [5 sec] | 150 | NA | Upto 6 Videos / mo | Upto 20 Videos / mo | Upto 20 Videos / mo per user |
| 32 | Ask AI (Dobby Chat) | 1x Chat Msg | 1 | Up to 200 chats | Up to 1000 chats/mo | Up to 3000 chats/mo | Up to 3000 chats/mo per user |
| 33 | Chrome Extension | Listing Insights | Free | Free | Free | Free | |
| 34 | Customer Insights | Customer Insights | Free | Free | Free | Free | |
| 35 | Listing Optimizer | Full Listing Optimization | 20 | 1 User included | 10 optimizations / mo | 50 optimizations / mo | 50 optimizations / mo per user |
What if I run out of PS Studio Credits?
There are 2 options you can either upgrade your monthly plan to include more credits monthly OR you can purchase Studio credits as a one-time top up by clicking the ‘Refill Now‘ button at the top right of your App page next to your credit usage or even from your Billing Page (look for the blue “Top Up Now” button) and top up 1000 studio credits in packs of $20 or more as you need! These credits roll-over so they never expire.
What is your Refund Policy?
ProductScope AI offers a free tier of the Services for you to try the Services before purchase. Also, ProductScope AI gives you immediate access to the Content you generated and cannot stop you from downloading the Content. Therefore, when you make a purchase, you acknowledge the suitability of the Services and waive your right to withdraw your purchase and request for refunds. If it’s only been 7 days since the payment AND you have not generated any images or videos yet, email us at support@productscope.ai to apply for a refund.
You can cancel your subscription anytime in your account under Billing > Manage Subscription > Cancel Subscription.
The subscription renewal charge follows the same grace window of 7 days and assuming you have not either used all your credits OR generated any images or videos, then you are eligible for a refund otherwise it is also non-refundable.
If you believe a technical issue prevented you from using the Services, contact us at support@productscope.ai
”GET
✨ We help you design stunning product photos and high-quality content in minutes using generative AI.
↓ Design & Market ANY product effortlessly ↓
All Rights Reserved.
PS Studio
PS Optimize
Free Tools
ProductScope Chrome Extension
Voice of Customer Analytics
Chatbot for eCommerce (AI Answer Generator)
Word Cloud Generator
Book Title Generator
Rap Name Generator
Team Name Generator
Middle Name Generator
Hook Generator
Quote Generator
LinkedIn Headline Generator
Art Prompt Generator
Etsy Shop Name Generator
SKU Generator
Image to Prompt Generator